You can easily create rich, nutrient-dense compost right from your kitchen and yard scraps. The process is simple, involving layering "green" materials (like fruit and vegetable peels) with "brown" materials (like dried leaves and cardboard). Our comprehensive guide on DIY Composting: How to Make Your Own Compost at Home walks you through every step, helping you create a free, high-quality soil amendment for your garden.
Composting at home offers numerous benefits, most notably a significant reduction in household waste.
Did you know? A large portion of our daily trash consists of compostable materials.
Food Scraps: 24.1%
Yard Trimmings: 12.1%
This process of DIY Composting: How to Make Your Own Compost at Home transforms this waste, including certified compostable plates from brands like Ecolipak, into a valuable resource. Your composting efforts not only lead to healthier gardens but also contribute to a healthier planet.
Key Takeaways
-
Composting turns kitchen and yard waste into rich soil for your garden. This helps reduce trash and makes plants healthier.
-
You need both 'green' materials like food scraps and 'brown' materials like dry leaves. Layer them to help them break down well.
-
Keep your compost pile moist like a wet sponge and turn it often. This helps air get in and speeds up the composting process.
-
Finished compost looks dark and crumbly. It smells like fresh earth. You can use it to improve garden soil or as a plant food.
Your Composting Starter Kit
Getting started with composting is easier than you think. You only need a few key items to begin your journey of turning waste into a garden treasure. This guide will help you assemble your simple starter kit.
Options for a DIY Compost Bin
First, you need a place for your compost to live. You can build a simple diy compost bin without spending much money. Many people find the perfect spot for their compost heap in a shady corner of their yard. For effective hot composting, aim for a pile that is at least 3x3x3 feet.
Here are some affordable materials for your project:
-
Wood pallets (often free)
-
Wire fencing or chicken wire
-
Large plastic trash cans or storage totes
-
Five-gallon buckets
DIY Tip: A 30-gallon plastic storage bin makes a great starter compost bin. Just follow these simple steps for making your diy compost bin: Drill 8-10 small holes in the bottom and lid for airflow. This simple setup is a key part of diy composting: how to make your own compost at home.
Collecting 'Green' (Nitrogen) Materials
Your compost needs "green" materials to provide nitrogen. Nitrogen is a crucial food source for the microorganisms that break down your waste. You can collect these items from your kitchen and yard.
Common green materials include:
-
Fruit and vegetable scraps
-
Coffee grounds and used tea bags
-
Fresh grass clippings
-
Eggshells (crush them first)
-
Old flowers
Using Compostable Bags for Scraps
Collecting kitchen waste can get messy. A countertop caddy lined with a compostable bag makes the process clean and simple. Ecolipak's Compostable Trash Bags are an excellent choice. They are BPI Certified, meaning they meet strict standards for breaking down into healthy compost. These durable bags also help contain odors, keeping your kitchen fresh while you gather your compostable materials.
Gathering 'Brown' (Carbon) Materials
To create healthy compost, you must balance your greens with "browns." Brown materials are rich in carbon and provide structure to your compost heap, allowing air to flow. The ideal composting ratio is about two to three parts brown materials for every one part green materials. This balance helps your pile heat up and decompose efficiently.
Great brown materials to gather are:
-
Dry leaves
-
Shredded cardboard and newspaper
-
Woody plant trimmings
-
Pine needles
-
Sawdust
What to Keep Out of Your Compost
Not all food scraps belong in your compost. Some items can create foul odors, attract pests, or harm your future plants. Keep your compost healthy by leaving these things out.
Avoid These Items:
Meat, fish, bones, and dairy products: These attract rodents and other unwanted animals.
Oils, grease, and fatty foods: They slow down the composting process and cause odors.
Diseased plants: Harmful pathogens can survive the composting process and spread to your garden.
Weeds that have gone to seed: The seeds can sprout in your garden beds later.
How to Make Compost: A Step-by-Step Guide
You are now ready to start building your compost pile. This easy tutorial will guide you through the process of turning your scraps into a rich soil amendment. Following these steps is the key to successful diy composting: how to make your own compost at home.
Step 1: Build a 'Brown' Base
First, you need to create a solid foundation for your compost heap. Start by laying down a thick layer of "brown" materials at the bottom of your bin or pile. This base layer is important because it helps with drainage and allows air to circulate from the bottom, preventing the pile from becoming a soggy mess.
Pro Tip: For a great start, make your initial brown layer about four to eight inches thick. This provides excellent airflow and structure for the composting process.
Step 2: The Layering Process for Making Compost
Now for the fun part: layering. The secret to fast and effective composting is alternating layers of green and brown materials. This creates the perfect environment for microorganisms to thrive and break down the waste. A good rule of thumb is to aim for a ratio of about three parts brown material to one part green material.
Here is a simple layering pattern to follow:
-
Add a layer of "green" materials about 2 to 4 inches thick on top of your brown base.
-
Next, add a "brown" layer about 6 inches thick on top of the greens.
-
Continue alternating these layers until your bin is full or you run out of materials.
Making compost can sometimes present challenges. If you notice problems, you can usually fix them by adjusting your layers.
|
Symptom |
Likely Cause |
How to Fix It |
|---|---|---|
|
Pile has a rotten smell |
Too many "greens" or too wet |
Add more "browns" like dry leaves or shredded cardboard. |
|
Pile is not heating up |
Not enough "greens" (nitrogen) |
Add a fresh layer of kitchen scraps or grass clippings. |
|
Pile is dry and not breaking down |
Too many "browns" or not enough water |
Add more "greens" and a little water. |
|
You see flies or pests |
Food scraps are exposed |
Cover the top of your compost heap with a final layer of brown materials. |
Step 3: Add Water for Moisture
Your compost heap needs water to stay active. The microorganisms doing all the work require a moist environment to survive and thrive. The ideal moisture level for compost is between 40% and 60%. An easy way to check this is with a simple squeeze test. Grab a handful of your compost material and squeeze it. It should feel like a damp, wrung-out sponge.
Follow these tips to keep your compost perfectly moist:
-
Add a little water each time you add a new layer of dry, brown materials.
-
Water the pile when you turn it to ensure moisture is distributed evenly.
-
Avoid overwatering. Too much water can fill air pockets and create a smelly, anaerobic pile.
Step 4: Turn the Pile for Aeration
Turning your compost pile is like giving it a breath of fresh air. Aeration provides the oxygen that beneficial microorganisms need to break down organic matter efficiently. This process, a core part of how to make compost, also helps mix the materials and distribute moisture and heat evenly. You can use a simple pitchfork or a specialized compost aerator tool with a corkscrew or wing design to make the job easier.
How often you turn your pile depends on how quickly you want finished compost. This is a key difference in diy composting: how to make your own compost at home.
|
Composting Method |
Recommended Turning Frequency |
|---|---|
|
Hot Composting (faster) |
Every 3-7 days |
|
Cold Composting (slower) |
Once or twice a month |
Regularly turning your compost heap speeds up decomposition, prevents odors, and helps you get that nutrient-rich "black gold" for your garden sooner.
Is Your Compost Ready?
After weeks or months of care, you might wonder if your compost is ready. The time it takes can vary greatly, from one to twelve months. This depends on how you manage your pile and the size of the materials you added. You can check for a few key signs to know when your hard work has paid off and your "black gold" is ready for the garden.
Check the Look and Feel
Your first clue is the appearance of the pile. Finished compost has a very distinct look and texture. You should no longer be able to identify most of the original kitchen scraps or yard waste. Grab a handful to see if it meets these criteria:
-
It has a dark, rich black or dark brown color.
-
The texture is crumbly and soil-like.
-
You cannot recognize the original materials, though a few tough items like twigs or eggshells might remain.
If your pile still has many recognizable food scraps, it needs more time to decompose.
Check the Smell
Your nose is another great tool for checking your compost. A finished pile should have a pleasant, earthy scent, much like the smell of a forest floor after it rains. You should not notice any sour or ammonia-like odors. A bad smell often means the pile has too much nitrogen or is too wet. If you notice an unpleasant aroma, turn the pile and add more brown materials to correct the balance. A fresh, earthy smell tells you the decomposition process is complete.
Using Your Finished Compost
Congratulations! You have successfully transformed your scraps into a valuable resource. Now you can use your homemade compost to enrich your garden and plants. This nutrient-rich material offers many benefits for all your growing projects.
Amend Garden Beds
You can greatly improve your garden's health by using your finished compost as a soil amendment. It adds vital nutrients and improves soil structure. For new garden beds, you should mix a 2 to 3-inch layer of compost into the top 6 to 8 inches of soil. This ensures the nutrients are available where plant roots will grow.
A good goal for raised beds is to have the organic matter content between 25% and 50% by volume. You can achieve this with a simple recipe:
-
50% topsoil
-
30% compost
-
20% other organic matter (like peat moss or coir)
This blend creates a perfect environment for vegetables to thrive.
Apply as a Top-Dressing or Mulch
You can also apply your finished material directly on top of the soil. This method is called top-dressing or mulching. Using it as a mulch helps your soil in two key ways:
-
Retains Moisture: A 2 to 4-inch layer on the soil surface reduces water evaporation. You will not need to water your plants as often.
-
Suppresses Weeds: The mulch layer blocks sunlight, which stops weed seeds from sprouting.
For lawns, you can top-dress by spreading a thin layer, about a quarter-inch thick, across the grass. This adds nutrients directly to the roots. The composting process provides a slow-release fertilizer for your lawn.
Create a Potting Mix
Your finished material is a fantastic ingredient for a DIY potting mix. It provides nutrients that container plants need. Sifting the material first is a good idea for pots, as it creates a finer texture. You can make a simple and effective mix for your containers.
Try this basic recipe:
-
Start with two parts coconut coir.
-
Add one part of your sifted homemade compost.
-
Mix in one part perlite for drainage.
This simple blend gives your potted plants a healthy start. Your composting efforts will pay off with vibrant, happy plants.
You now know the simple steps for successful diy composting: how to make your own compost at home. You gather and layer your materials, keep the pile moist, and turn it for air. This process transforms your waste into rich compost.
Your composting efforts significantly reduce harmful methane emissions from landfills. This finished compost also enriches your garden soil, helping you grow healthier plants.
Start your composting journey today with Ecolipak and turn your scraps into a valuable resource! Potted plant
FAQ
How long does it take to make compost?
The time varies based on your method. Hot composting can give you finished compost in one to three months. Cold composting is slower and may take six months to a year. Turning your pile regularly speeds up the process.
What should I do if my compost pile attracts pests?
Pests often appear when you leave food scraps exposed. You can solve this by always covering new green materials with a thick layer of browns, like dry leaves or shredded cardboard. This simple step keeps your pile clean and pest-free.
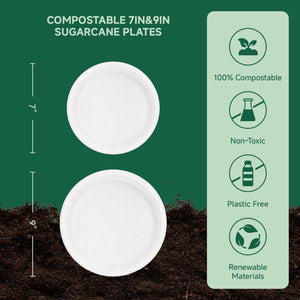
Can I add compostable products to my pile?
Yes, you can add certified compostable products. Items like Ecolipak's Compostable Trash Bags and sugarcane plates are designed to break down in a compost environment. Just be sure to cut them into smaller pieces to help them decompose faster.
Can I compost in a small space like an apartment?
Absolutely! You can use a small, sealed bin for indoor composting, often called a worm bin (vermicomposting) or a bokashi bin. These methods are compact, odor-free, and perfect for turning kitchen scraps into a nutrient-rich resource without needing a large yard.