Yes, you can start transforming paper plates into a powerful fuel for your tomato plants. This simple solution turns household waste into a valuable amendment for your tomato garden. You will grow a healthier tomato and get a better quality harvest. This clever trick reduces waste and supports sustainability. Ecolipak's compostable paper plates offer the perfect natural solution.
Your tomato plants crave key nutrients for the best quality fruit: Nitrogen for growth, Phosphorus for roots, and Potassium for sugar production. This hack helps fuel your tomato, reducing waste.
Key Takeaways
Turn paper plates into compost for your tomato plants. This helps your plants grow better and reduces waste.
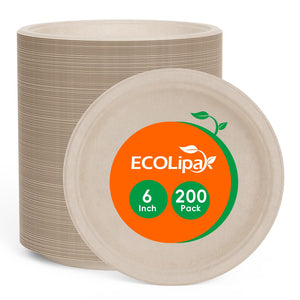
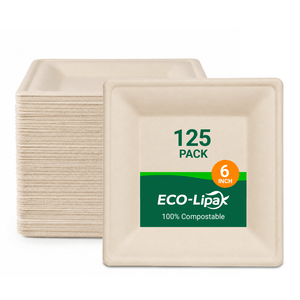
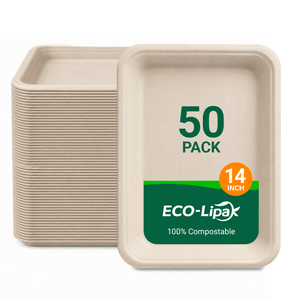
Use Ecolipak compostable sugarcane plates. They are safe for your garden and break down easily.
Shred and soak the plates before adding them to your compost pile. This helps them break down faster.
Mix 'brown' materials like shredded plates with 'green' materials like food scraps. This makes good compost.
Use the finished compost to feed your tomato plants. This gives them nutrients for a better harvest.
Why Ecolipak Plates Are The Ideal Choice
Choosing the right plate is the first step to creating high-quality compost. Your garden needs a clean, natural source of carbon. Ecolipak's Compostable Sugarcane Plates provide the perfect material for this garden hack. This simple solution helps you turn party leftovers into plant food.
Using The Right Compostable Plates
You should use plates that help your garden, not harm it. Ecolipak plates are made from 100% sugarcane fiber, also known as bagasse. This material is a renewable resource, making it a smart choice for the planet. The plates are fully biodegradable and break down easily. This makes them an excellent biodegradable solution for reducing household waste.
Most importantly, you need to protect your soil's health. Ecolipak plates offer a safe and effective way to enrich your garden.
Gardener's Tip: Always look for plates that are BPI Certified and BPA-Free. This certification guarantees the product contains no intentionally added fluorinated chemicals (PFAS). It ensures that no harmful toxins will leach into your soil, keeping your future tomatoes safe and healthy.
Using the right compostable plate is the best solution for creating nutrient-rich soil from your kitchen waste. You can feel confident you are improving your soil quality.
What to Avoid for Safe Composting
Not all disposable plates are safe for composting. Many common plates can add harmful substances to your garden. You must avoid plastic or wax-coated plates. These products do not break down properly and can contaminate your soil with chemicals like BPA and phthalates. This contamination lowers the quality of your compost and can harm your plants.
Wax coatings also create problems. The wax slows the composting process and can harm the helpful worms and microbes in your compost pile. Using the wrong plate turns your compost effort into toxic waste. A truly natural plate should be your only choice.
This simple table shows why bagasse is the clear winner for your garden:
Feature |
Ecolipak (Bagasse) |
Plastic-Coated Paper |
|---|---|---|
Raw Material |
Renewable agricultural waste |
Trees and petroleum |
Compostability |
Fully biodegradable (30-90 days) |
Not compostable; creates waste |
Soil Safety |
Enriches soil, toxin-free |
Can leach microplastics & chemicals |
The Process of Transforming Paper Plates
Now you are ready for the fun part. The process of transforming paper plates into garden gold is simple. You just need to break down the plates and add some water. This prepares them for the compost pile. This easy solution turns household waste into a nutrient-rich amendment for your garden.
Shred or Tear Plates for Faster Breakdown
Your first step is to break the Ecolipak plates into smaller pieces. You can use scissors to cut them or simply tear them by hand. This action greatly increases the surface area of the material. Think of it as an open invitation for microbes to come in and feast. More surface area means the tiny organisms in your compost can work much faster.
This simple step is key to quick composting. For the best results, follow these tips:
Aim for pieces about one to two inches in size.
Smaller pieces decompose faster, but avoid turning the material into a paste. This can block airflow.
This same principle applies to other compost items, like tough broccoli stalks or corn cobs.
Breaking down the plates helps you manage the decomposition process. It ensures your compost pile works efficiently.
Soak The Pieces to Kickstart Composting
Next, you need to add moisture. Microbes need water to survive and begin their work. Dry materials like sugarcane plates can resist water at first. Soaking the shredded pieces gives them a head start. This step is crucial for transforming paper plates into compost.
Pro Tip: For optimal results, aim for a moisture level between 65% and 70% when you start. The pieces should feel like a damp sponge. This high moisture level kickstarts the biological process, reducing the time it takes to break down the waste.
Place your shredded plates in a bucket and cover them with water. Let them soak for at least an hour. This ensures they are fully saturated. This initial soaking helps the materials absorb and hold moisture later, creating the perfect environment for decomposition.
Building Your Compost Fuel Pile
With your soaked plate pieces ready, you can now build the compost pile. Creating the right mix of materials is the secret to fast, odor-free decomposition. This process turns kitchen scraps and yard trimmings into a rich soil amendment for your tomatoes.
Balancing Carbon 'Browns' and Nitrogen 'Greens'
A healthy compost pile needs a balanced diet of two material types: 'Browns' and 'Greens'.
'Browns' (Carbon): These are dry, woody materials. Your shredded Ecolipak sugarcane plates are a perfect carbon source. Other great 'Browns' include dry leaves, shredded cardboard, and paper towel rolls.
'Greens' (Nitrogen): These are moist, fresh materials. Common examples include fruit and vegetable scraps, coffee grounds, and fresh grass clippings.
The ideal mix is about 25 to 30 parts carbon for every one part nitrogen. This ratio fuels the microbes that break down the organic waste. Your Ecolipak plates also provide a unique benefit. They act as a natural moisture manager, soaking up excess liquid from wet kitchen scraps and preventing the pile from becoming a soggy mess.
How to Layer Your Compost Bin
Layering your materials correctly creates the perfect environment for decomposition. This simple solution ensures air and moisture are distributed evenly throughout the pile. Follow these easy steps to build your compost fuel pile:
Start with Browns: Begin with a 3-4 inch layer of 'Browns' at the bottom of your bin. This can be a mix of your soaked Ecolipak plates and dry leaves.
Add Greens: Add a thinner, 2-3 inch layer of 'Greens' like vegetable peels and coffee grounds on top.
Repeat Layers: Continue alternating between 'Brown' and 'Green' layers until your bin is full. Lightly water each 'Brown' layer to keep it damp.
Finish with Browns: Always end with a final 4-inch layer of 'Browns' on top. This helps prevent odors and discourages pests.
Pro Tip: To speed up the process, you should turn your pile with a pitchfork every three to four days. This introduces oxygen, which is essential for the microbes to work efficiently and break down the materials faster.
Fueling Your Tomato Plants with Compost
After weeks of care, your compost pile is ready to become a powerful fuel for your tomato plants. This final step transforms your hard work into a bountiful harvest of high-quality fresh tomatoes. Applying this rich, natural amendment will give your tomato plants the boost they need.
How to Know When Your Compost is Ready
You will know your compost is ready when it looks and smells right. Finished compost is dark, crumbly, and has a pleasant, earthy scent like a forest floor. A well-managed pile can be ready in as little as two to four months.
Compost Tip: An active compost pile heats up as microbes work. The ideal temperature is between 130°F and 160°F. This heat breaks down materials quickly and kills off weed seeds and pathogens, ensuring a high-quality product for your tomato garden.
If your pile has cooled down and you can no longer identify the original materials, your tomato fuel is ready to use.
Harvesting More Fresh Tomatoes
You can use your finished compost to feed your tomato plants in two simple ways. Both methods improve soil quality and lead to more fresh tomatoes.
Mix into Soil: Before planting a new tomato seedling, mix a generous amount of compost into the garden soil. This improves the soil structure, helps it hold water, and provides a slow release of nutrients for strong root development. Better roots mean a healthier tomato plant.
Use as Mulch: You can apply a 2-3 inch layer of compost around the base of an existing tomato plant. This acts as a top dressing or mulch. It suppresses weeds, retains soil moisture, and slowly feeds your tomato plant over time.
This compost "fuel" enhances soil aeration. Better aeration helps the tomato roots absorb more nutrients. This process directly contributes to a larger harvest of quality fresh tomatoes. You will grow amazing fresh tomatoes with this simple hack.
Imagine the plate from today's fresh tomato salad. You can complete the cycle by transforming paper plates into rich compost for your next tomato plant. This simple solution reduces household waste and improves your soil quality. You will grow a higher quality tomato and a better tomato harvest.
This process of transforming paper plates keeps organic waste out of landfills. You help reduce harmful methane gas and create amazing food for your next tomato plant. It is the best way to get a quality tomato for your next tomato salad. This is the secret to a perfect tomato, a healthy tomato, and a happy tomato plant.
Make your garden and the planet healthier. Eco-Friendly Packaging, Go for ECOLipak.
FAQ
How do these plates help my compost pile?
Your shredded Ecolipak plates are a key carbon source, or 'Brown' material. They balance nitrogen-rich 'Greens' like tomato scraps. The plates also absorb extra moisture. This prevents a soggy pile and creates the perfect environment for decomposition, which helps your future tomato plants.
Can I put the plates directly in my tomato garden?
Yes, you can. Use shredded, soaked plate pieces as a mulch around the base of your tomato plant. This layer helps the soil hold moisture and stops weeds. As the pieces break down, they slowly release nutrients, feeding your tomato plant's roots over time.
How does this process help my tomato plants?
This hack creates a perfect circle of sustainability. The plate from today's tomato salad becomes rich food for next season's tomato harvest. This compost gives your tomato plant the nutrients it needs for strong growth and a better quality tomato. It is a great cycle for any tomato.
How long until the compost is ready for my tomato plants?
A well-managed compost pile can be ready in two to four months. You will know it is finished when it looks dark and crumbly. The finished compost will provide excellent nutrients for your tomato plants, ensuring a healthy and productive tomato harvest.